Your First Module with Max
For our first module, we will make a simple low-pass filter, with one big knob to control the cut off frequency. First create your new project by creating a directory and populating it with a simple template. You can create your project wherever you see fit. In this example, we created it in our home folder.
~$ mkdir LowPass
~$ cd LowPass
~/LowPass$ erbb init --name LowPass --language max
Note
In the following source code files, we have removed all comments to keep the file easy to read for this tutorial.
Let’s now add the pot with a big knob, by editing the Lowpass.erbui file,
as highlighted in the following erbui source code:
// LowPass.erbui

module LowPass {
   width 12hp
   board kivu12
   material aluminum
   header { label "LowPass" }

   control freq Pot {      // 1
      position 6hp, 34mm   // 2
      style rogan, 6ps     // 3
      label "FREQ"         // 4
   }

   control audio_in AudioIn {
      position 4hp, 96mm
      label "IN"
   }

   control audio_out AudioOut {
      position 4hp, 111mm
      label "OUT"
   }
}
The highlighted code:
Add a pot and give it the name
freq(we will see how names are used later)Give it a position, first is on the horizontal axis, and second is on the vertical axis. Note that both have units, with
hpbeing the Eurorack HP for convenience. Since half of 12HP is 6HP, this will place the pot at the horizontal center in the moduleLet’s give it a specific style, which here is the knob style.
roganis the brand of the knob used in many Mutable Instruments and Make Noise modules, and6psis the Rogan manufacturer part name. You could use herexlargeinstead. The style is optional, so you can remove this line and the engine will select one default style for you.Give it an optional label, which will be printed on the front panel aluminum.
Now, we have to update the gen~ DSP code to add the low-pass filter.
Thanks to Max, we have a large number of DSP blocks available at our fingertips!
Open the
LowPass.maxpatMax patch in Max, and then open the gen~ box,Remove the 2
inandoutboxes as we are going to replace them,Go in the Help menu and select the example,
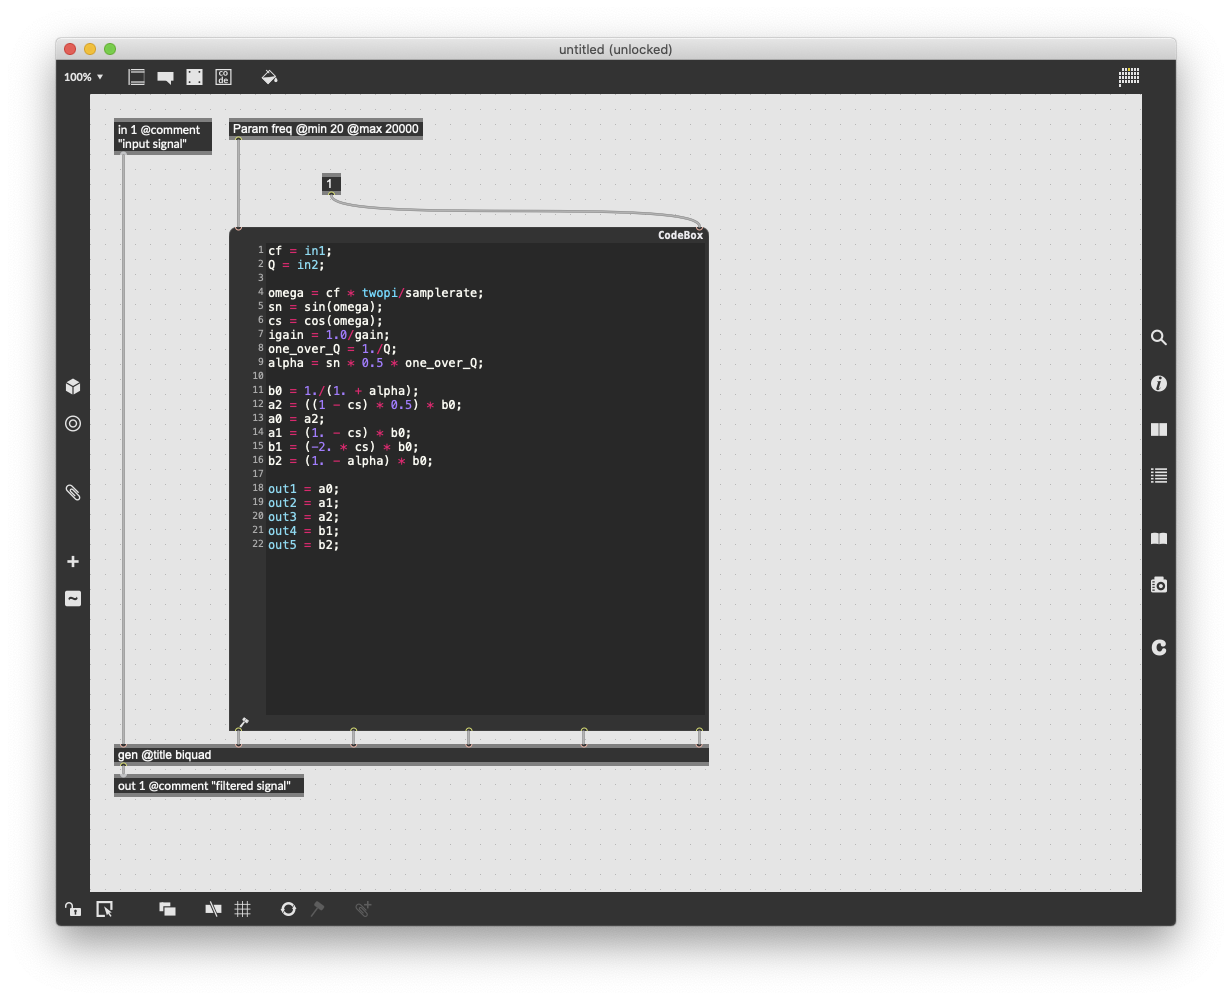
Open the gen~ @title lowpass on the right side of the patch,
After unlocking the file, copy its content to our gen~ box,
Replace the in 2 box with Param freq @min 20 @max 20000, and note that we use the same param name
freqas the one in theerbuifile upper,Replace the in 3 box with 1,
Save the file
Your gen patch should look like the following:
Now you can save your patch, wait for the module to be built, and run VCV Rack to see what it sounds like. That works! Now the FREQ button behaves a bit differently to what you would be used using Eurorack modules, but that’s because we would need to apply an exponential mapping to the FREQ pot. But that will be for another tutorial!