Getting Started with DIY
Note
If you are looking how to assemble the Starter Kit, go here instead.
Overview
So, you decided to go the full route into doing your own module, from scratch. Bless you! This is how we started also. If you are a beginner, you will want to read on, because we started like you do, and not so long ago, and you might find this is easier than you think. Apart from gear, the only thing you need to have is a bit of time.
There are 3 components to a fully assembled module:
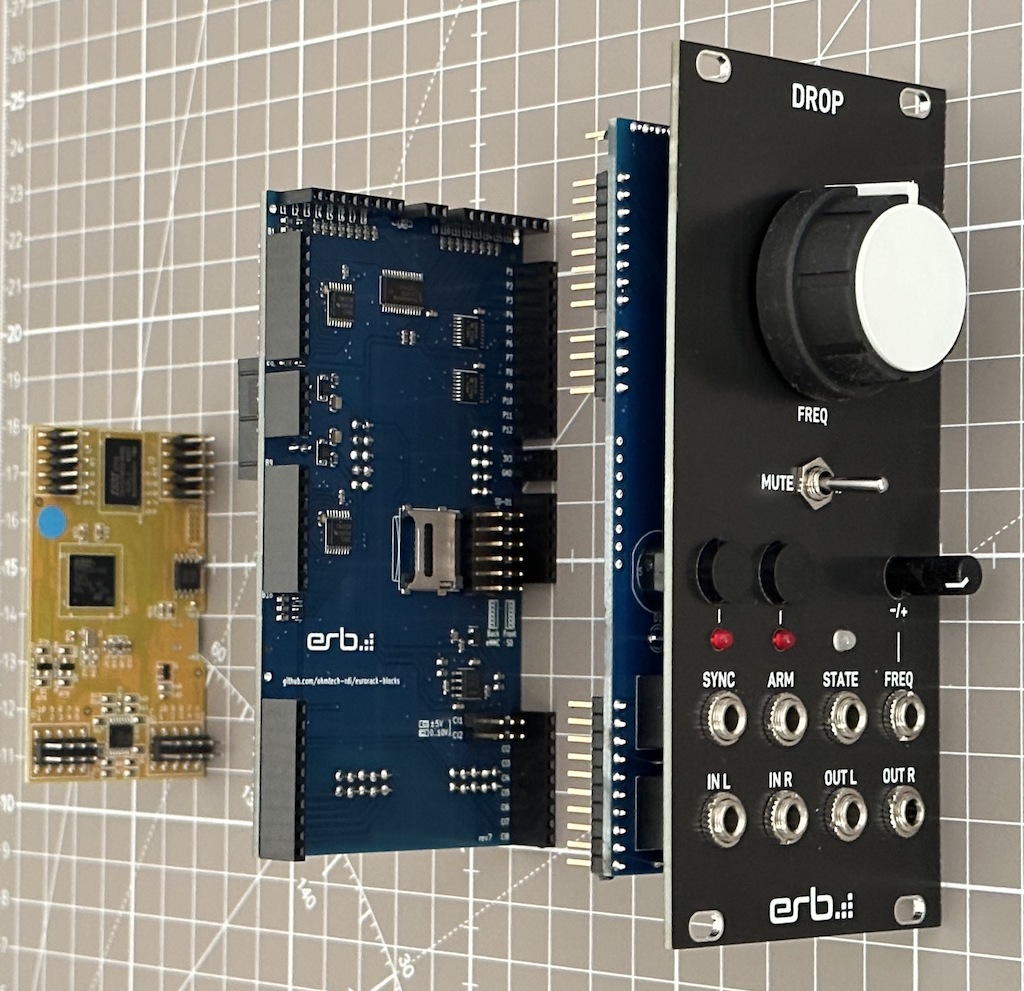
The most left one is the Daisy Patch Submodule. And you don’t want to solder that because it contains BGA (Ball-grid-array) components which requires special tooling to assemble and verify alignment (even an X-ray machine!)
The two on the right are the one we will build:
The middle one is the board, like
kivu12and contains only surface mount (SMD) components (apart from pin sockets),The right one is the front panel, that is specific to your module, and contains only through-the-hole (THT) components (except rare exceptions).
The right one is the only thing that people need to solder when they buy their module with the “kit” option on the market place (coming soon), so you might consider that, if you have a SMD-phobia.
Security First!
Things can go very bad in a snap. Thing can go very wrong when you are exposed to dangerous chemicals on the long run. Here are very important advices you need to keep in mind:
Have always a small office fire extinguisher at hand.
Always observe the Material Safety Data Sheet (MSDS) for every materials you use.
It’s simple as that. When you buy something like soldering wire or paste, or Isopropyl Alcohol (IPA), or anything else, there is always a MSDS companion file. You might also find that some special chemicals need a special fire extinguisher. Not all fire extinguishers are the same! Always read it carefully! Keep your loved ones and yourself safe.
Read the MSDS in any case. Usually this involves:
Wear gloves and long sleeves (or, even better, a lab coat) to avoid contact with your skin,
Wear safety glasses to avoid contact with your eyes,
Have a well ventilated room (natural air flow or using a fume extractor) and, when required, wear appropriate respiratory equipment.
Soldering Equipment and Guides
When it comes to equipment, a lot of options are available! We made a curated list of links from Adafruit and Sparkfun, with tutorial videos, we think are good at any level:
Through-the-hole (THT) soldering
A beginner guide to soldering
A more detailed guide to soldering
A guide to excellent soldering
An easy way to solder headers perfectly aligned, especially important when soldering your back board so that it matches perfectly your front board!
Surface-mounted device (SMD) soldering
Important
Be sure to read the MSDS companion files (when relevant) before using those products!
That’s it! But before we can start to solder our boards, we first need to order all the board parts, and we will explain this in the next section.