C++ on macOS with Xcode
Requirements
Note
macOS 10.15 (Catalina) has limited support. Some tools do not always work properly, so macOS 11 (Big Sur) or later is recommended.
Before we can setup Eurorack-blocks, we will need to have on your system:
If you are a developer, there is a chance that most of them are installed already.
In all cases, please make sure that the Python in use is not the one from Xcode.
You can verify this by typing which python3 in the Terminal and looking for the mention
of Xcode in the returned path. If this command didn’t return anything, then you do not
have Python installed, and please use the link above to install it.
Experienced developers might already have one (or multiple!) versions of Python installed. For Eurorack-blocks, please use at least Python 3.7.
Note
Please use the copy button on the top right corner of the following code blocks to copy/paste the commands in your terminal.
You can check your installation by trying the following commands, and checking it doesn’t return an error or something else than it version. Versions are shown here for a concrete example, they might be different on your computer.
MyMac:~ $ git --version
git version 2.41.0
MyMac:~ $ python3 --version
Python 3.11.4
MyMac:~ $ xcodebuild -version
Xcode 13.4
Build version 13F17a
MyMac:~ $ which python3
/Library/Frameworks/Python.framework/Versions/3.11/bin/python3
Note that Xcode doesn’t appear in the above path.
Cloning
Clone the repository. This will create a eurorack-blocks directory into the current working directory, with all dependencies.
MyMac:~ $ git clone --recurse-submodules https://github.com/ohmtech-rdi/eurorack-blocks.git
Will typically output:
Cloning into 'eurorack-blocks'...
remote: Enumerating objects: 14327, done.
...
Submodule path 'submodules/libDaisy/tests/googletest': checked out 'f5e592d8ee5ffb1d9af5be7f715ce3576b8bf9c4'
Submodule path 'submodules/vcv-rack-sdk': checked out '91fd742827c04d36ba9b0e5e179571e393682326'
Setting up
First change the current directory to eurorack-blocks:
MyMac:~ $ cd eurorack-blocks
Then install by running the script below:
MyMac:~/eurorack-blocks $ ./build-system/install.py
This will add the erbb script to your PATH, but the PATH will be set only for new terminals.
You can either close your current terminal and open a new one, or source the erbb environment
explicitly into your current shell session:
MyMac:~/eurorack-blocks $ source ./build-system/init.sh
Then:
MyMac:~/eurorack-blocks $ erbb setup --with-xcode-support
This will take a bit of time depending on your Internet connection.
erbb setup by itself is installing dependencies internally without modifying anything on
your system. If you delete the eurorack-blocks folder, boom, everything is gone.
The additional options, usually starting with --with do change your system. For example
here we install the syntax highlighting for the custom languages that Eurorack-blocks use,
but this is pretty harmless.
If you want to see exactly what it does and copy, navigate to build-system/setup/__init__.py,
and look at the install_xcode_support function.
You can now start to use eurorack-blocks 🎉
Testing a Sample
Let’s test a sample. We’ll use the Drop sample.
MyMac:~/eurorack-blocks $ cd samples/drop
MyMac:~/eurorack-blocks/samples/drop $ erbb configure
If you inspect the drop folder, it now contains an artifacts directory, with some folders and files.
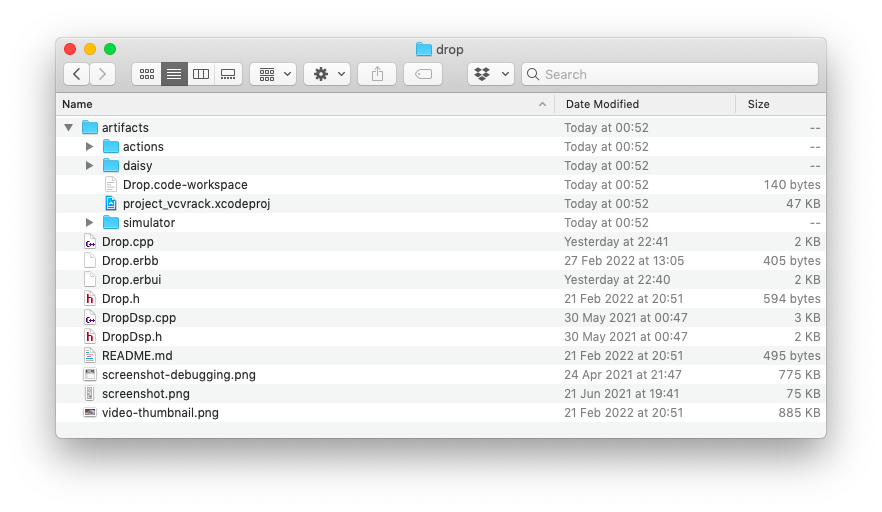
The project_vcvrack.xcodeproj is an Xcode project, to develop, build and debug the
simulator module on macOS.
Let’s open it:
MyMac:~/eurorack-blocks/samples/drop$ open artifacts/project_vcvrack.xcodeproj
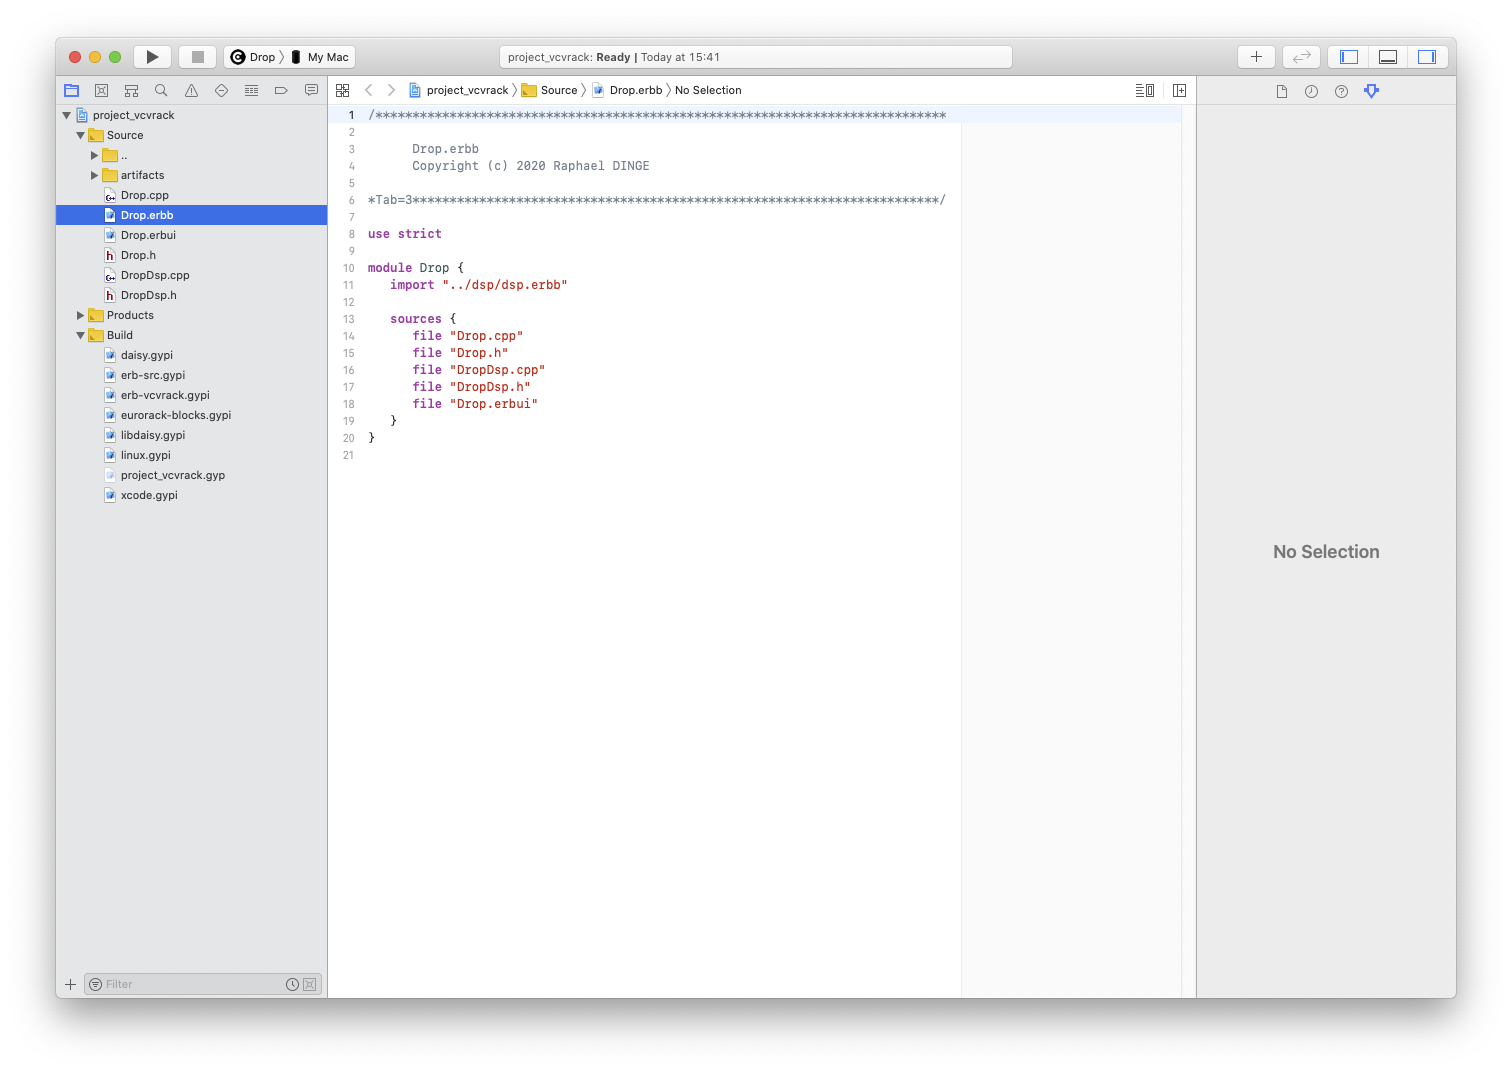
You can now press ⌘B or select the menu Product > Build to build, and then
press ⌘R or select the menu Product > Run to run VCV Rack and test your
module.
Important
The debugger is waiting for VCV Rack to start. You need to start VCV Rack manually, and the debugger will attach to it automatically.
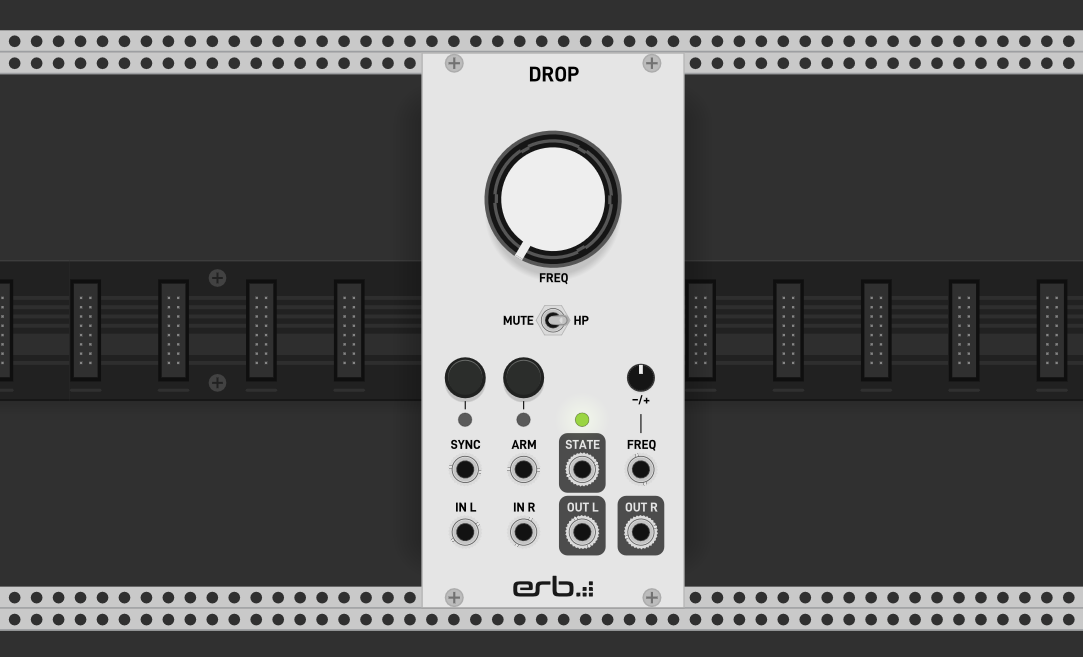
Testing in VCV Rack
In VCV Rack the Drop module will appear in the library when right-clicking in the rack empty space.
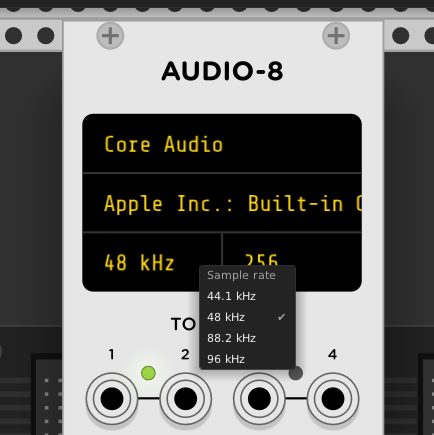
Important
Before starting to play with it, make sure to setup your audio device, and set the sample rate to 48kHz! This requirement will be explained later in the tutorial.
Testing in your Eurorack System
If you bougth the Eurorack-blocks Starter Kit, it comes with the Drop module, and you should have already assembled it by now.
You can build the firmware by running:
MyMac:~/eurorack-blocks/samples/drop $ erbb build firmware
BUILD libDaisy
mkdir Release
ACTION UI
ACTION Daisy
...
LINK Release/Drop.elf
Memory region         Used Size  Region Size  %age Used
           FLASH:       81928 B       128 KB     62.51%
         DTCMRAM:          0 GB       128 KB      0.00%
            SRAM:      519696 B       512 KB     99.12%
          RAM_D2:       16968 B       288 KB      5.75%
          RAM_D3:          0 GB        64 KB      0.00%
         ITCMRAM:          0 GB        64 KB      0.00%
           SDRAM:          0 GB        64 MB      0.00%
       QSPIFLASH:          0 GB         8 MB      0.00%
OBJCOPY Release/Drop.bin
OBJCOPY Release/Drop.hex
To install the firmware:
Connect the same USB cable that you used for installing the Frohmager firmware,
Run the following command and follow the on-screen instructions:
MyMac:~/eurorack-blocks/samples/drop $ erbb install firmware
Enter the system bootloader by holding the BOOT button down,
and then pressing, and releasing the RESET button.
Press Enter to continue...
...
Note that if you bought a STLink V3 Mini for example from Electro-smith, you can use it to program the Daisy Patch Submodule. It has the advantage to be more convenient, as:
It is typically faster than using the USB port on the Daisy Patch Submodule,
You don’t need to remove your module from your base to press those BOOT and RESET button.
The install command will automatically select the STLink V3 Mini to install the firmware
if it is plugged on your computer.
Have fun!
Maybe now is a good time to head over to Your First Module with C++ to learn more about the Eurorack-blocks’ C++ framework.